Every legend
starts somewhere.
Welcome to Orbit. Find your first hunt, build a stronger character and discover what to do next. This guide takes you from the temple to Masteries, equipment, dungeons, bosses, travel and your first guild.
Start with the current client
Download Orbit for Windows or Android from the official Downloads page. On Windows, close your clients and reopen the launcher to receive updates.
Check your equipped items, backpack, healing supplies and spell hotkeys before leaving the temple. Choose equipment you meet the level and vocation requirements for.
Download Orbit →Follow the temple teleports
Use the labelled Hunting and Quests teleports to find content for your level. Start with a comfortable spawn and move up when you can survive and sustain your healing.
Inspect your target and practise your healing before moving into a more difficult area.
Browse equipment by level →More than experience
Quests, eligible boss kills and discoveries can reward Mastery Points. Check the Mastery Point Tracker for objectives you have not completed.
Improve a balanced set of equipment rather than relying only on one strong weapon.
Plan your next Mastery Point →Your temple, at a glance.
These are the entrances around the temple. Follow their in-game labels and use the screenshots below to recognise them.
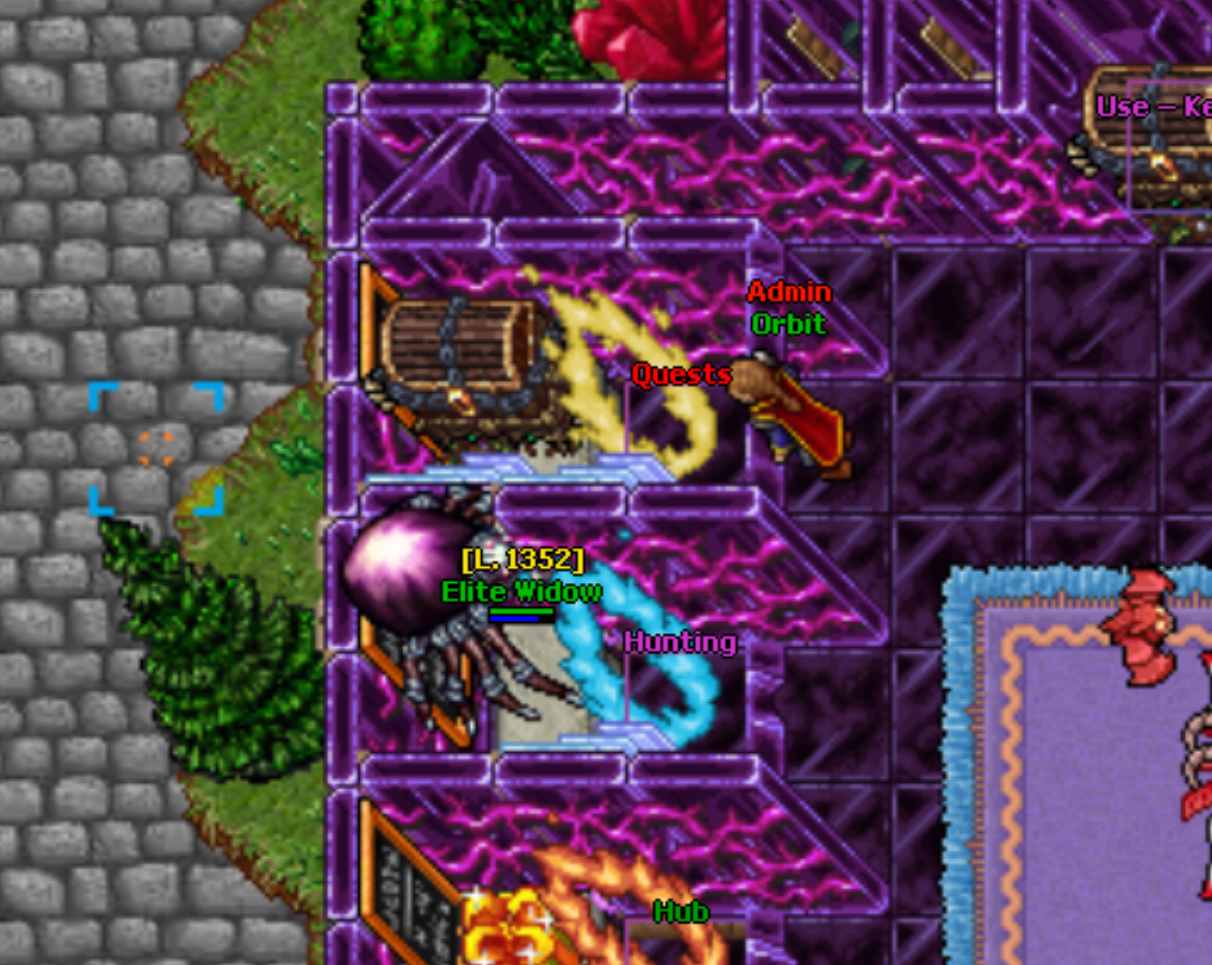
Quests
The yellow Quests portal beside the chest display leads to the quest area. Browse the level sections and read each quest’s requirements before entering.
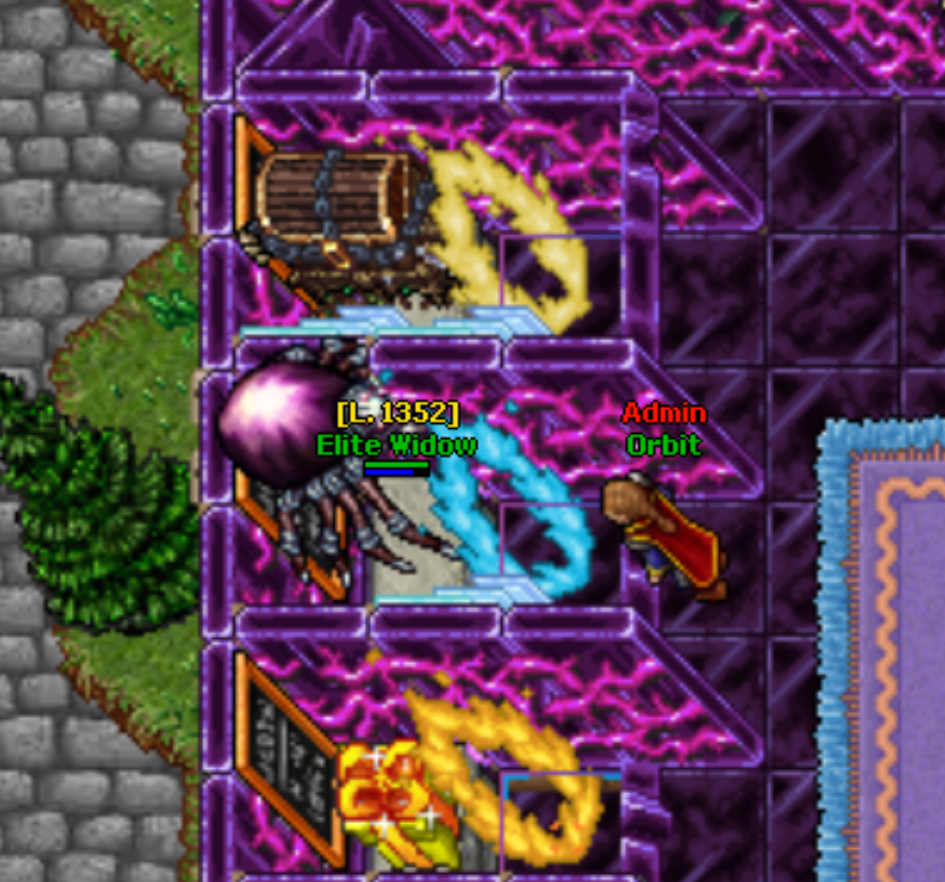
Hunting
Use the blue Hunting portal beside the spider display to find hunting destinations. Choose an area suited to your level, equipment and healing, then start with smaller pulls.
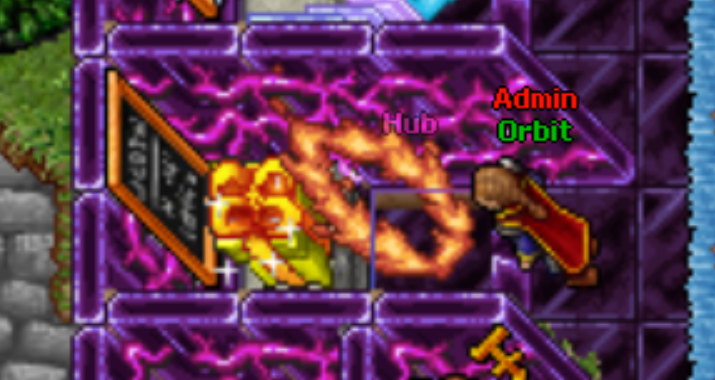
Hub
Look for the orange portal labelled Hub, below Hunting. Use it to explore the Hub and the services available there.
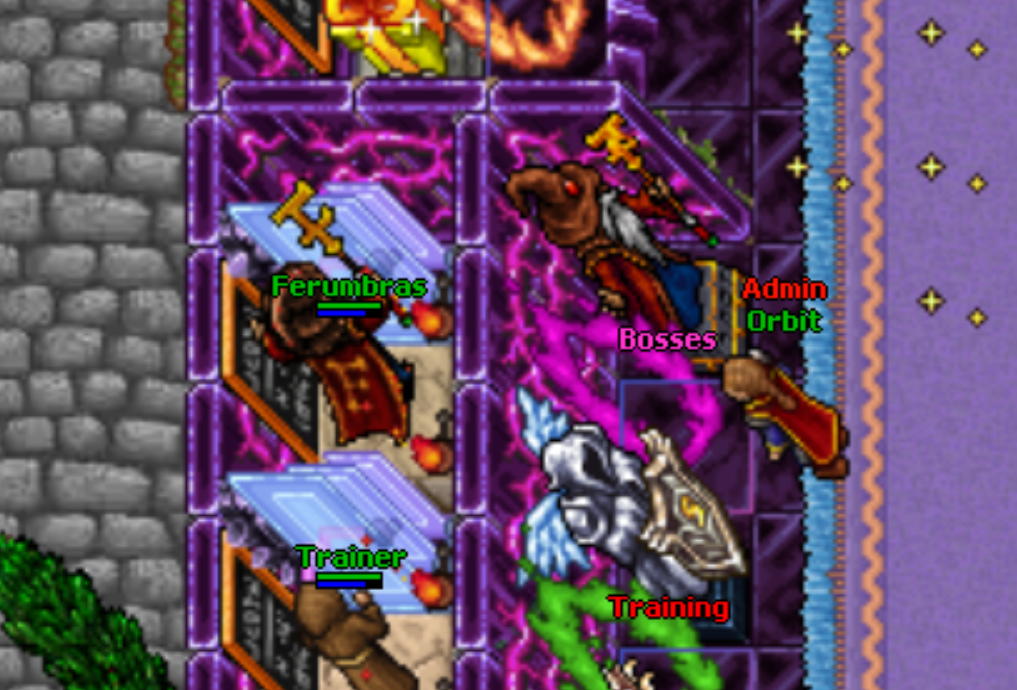
Raid bosses
The purple Bosses portal, beside the boss displays, is your route to the raid-boss area. Follow the relevant spawn announcements; a portal being present does not mean a boss is alive.
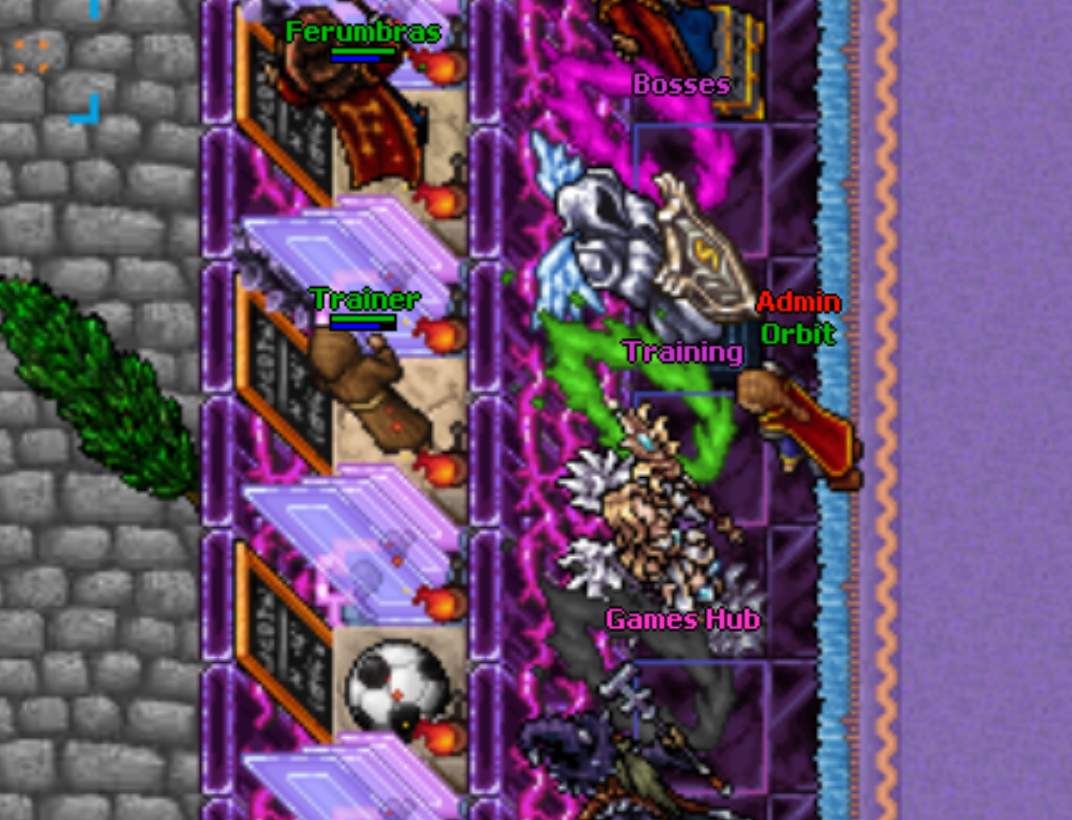
Training
The green Training portal sits below Bosses, beside the trainer displays. Head here when you want to work on your character’s skills.
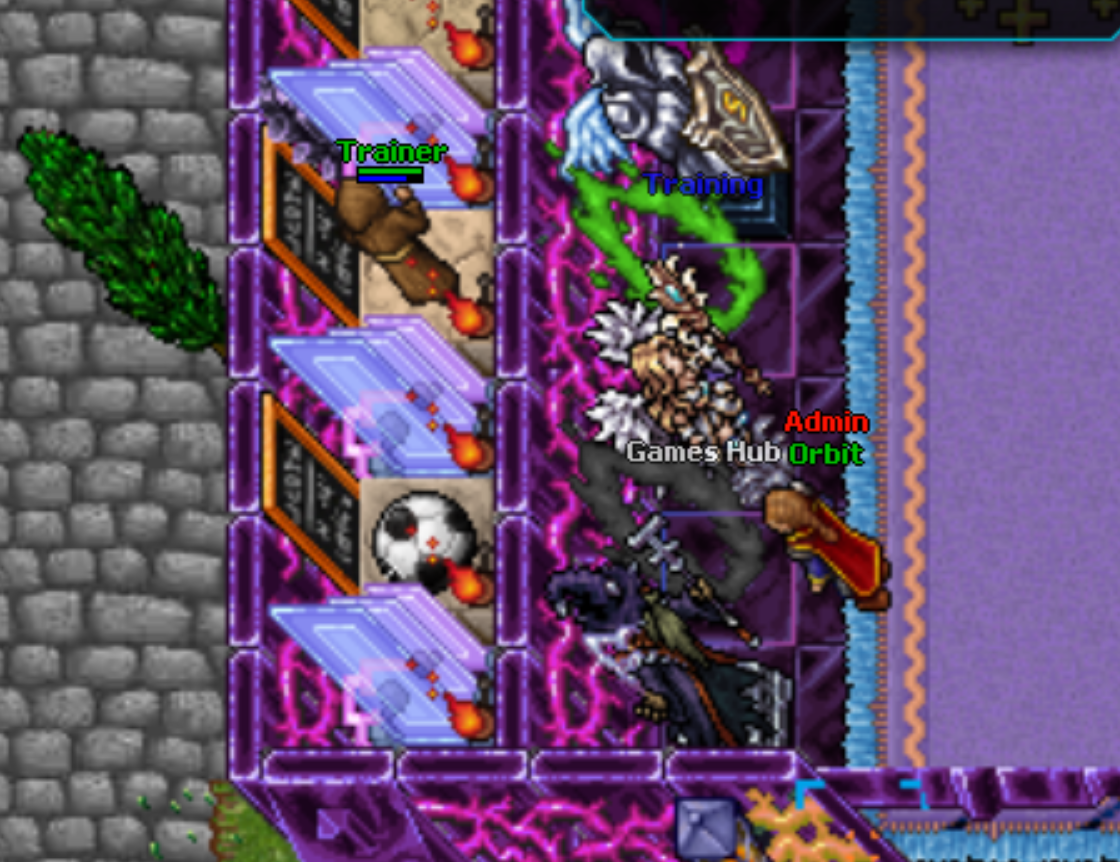
Games Hub
The Games Hub portal is below Training, near the football display. Visit for Tower Defence, Red Light Green Light, Football and casino games. Scheduled events are also listed through !events.
Select a screenshot to view it at full size.
Set yourself up before the first pull.
Start with a small group of monsters, check that your setup works, then increase the pace. Reaching an area's entry level does not guarantee that you can survive a large pull there.
- Check every equipment slot: weapon, armour, ring, amulet, charms and any ammo-slot equipment you use. Read the level and vocation requirements.
- Put your main attack, healing spell and healing or mana item on comfortable hotkeys. Practise using them before you are surrounded.
- Type
!spellsto review your vocation's spells. Check level, mana and any unlocking requirements before choosing a new attack. - Open
!masteryand review your unspent points. Choose enough survival to support the way you want to hunt. - Use
!blessbefore hunting and read the response. Keep track of your blessings after a death. - Check backpack space, carrying capacity and supplies. Make room for loot before a long trip.
- Use
!autolootto read the collection commands, then choose what you want to pick up. Your list has a slot limit. - Inspect your target, observe the damage you take and adjust the size of your pulls before moving into harder content.
Masteries make your build.
Type !mastery to open your Mastery window. Your level, gear, charms and allocated Masteries all contribute to your character's strength.
Choose what your character needs
- Power improves damage; Strength improves critical damage.
- Protection reduces incoming damage, while Life and Essence improve maximum health and mana.
- Piercing helps your attacks get through Protection. Its effectiveness follows the server's combat rules.
- Use the Ultra selection for additional options, including Ultra Power, Ultra Strength, Luck and Boss Protection.
Start simple, then specialise
If you are struggling to survive, invest in survivability as well as damage. A damage-focused build and a defensive build make different choices across Masteries, equipment and charms.
Review your vocation's spell-tree perks too. Read each option's cost, limit and prerequisites before spending points. Move into a protection zone if an allocation is blocked.
Full Mastery and spell-tree guide →Mastery ranks, costs and Ultra.
These are the current allocation limits in the Mastery window. The cost is the number of Mastery Points spent for one rank. Equipment and other earned bonuses contribute separately.
| Mastery | What it helps | Maximum allocation | Cost per rank |
|---|---|---|---|
| Power | Damage dealt | 250 | 1 |
| Protection | Incoming damage | Knight 30 / Paladin 25 / Mages 20 | 1 |
| Strength | Critical-hit damage | 250 | 1 |
| Piercing | Bypassing Protection | 20 | 5 |
| Life | Maximum health | Knight 500 / Paladin 150 / Mages 50 | 1 |
| Essence | Maximum mana | 100 | 1 |
| Ultra Power | Additional damage | 100 | 10 |
| Ultra Strength | Additional critical damage | 100 | 10 |
| Ultra Luck | Luck | 30 | 5 |
| Boss Protection | Less remaining boss damage | 30 | 1 |
When to explore Ultra
Open the Ultra selection inside your Mastery window. Ultra Power and Ultra Strength add 1% in their named stat per rank; Ultra Luck adds 1% Luck per rank. Compare their costs with what the same points could do in your normal Masteries.
Boss Protection reduces the damage remaining after normal Protection for qualifying boss attacks. It has no PvP effect. Consider it for boss-focused play alongside a complete defensive build.
Spell trees are another choice
Your vocation also has spell-specific Mastery perks. Read the spell named on the node, its effect at the selected rank and any prerequisites. A perk for a spell you do not use will not help your normal rotation.
Think about your main activity: solo hunting, supporting a group, fighting bosses or PvP. Review your choices when your equipment or spells change, using the costs and controls shown in the window.
Understand your combat stats.
Damage-focused
Prioritise useful Power, an appropriate weapon and offensive bonuses that support your vocation. Strength increases critical-hit damage; Stronger hit chance determines how often critical hits occur. They are different stats.
Piercing helps your attacks get through a target's Protection. It does not turn every attack into a fixed hit, and combat-specific modifiers can affect its final contribution.
Defence-focused
Build around Protection, an appropriate health or mana pool and dependable recovery. Look across armour, rings, amulets, charms and Masteries rather than expecting one item to solve survival.
A larger pool gives you more room to react, but does not replace reliable healing or choosing a manageable number of enemies.
Balanced
Begin with enough survival to hunt comfortably, then improve damage. If you are safe but kill slowly, consider offensive upgrades. If you die before you can react, check defence, supplies and positioning first.
Use Player Inspect to compare complete builds, including item upgrades and rarity. Character level alone does not show the whole picture.
Spells, healing and your vocation.
Match your setup to your character
- Knight: prepare close-range attacks and a reliable health-recovery rotation. Durability helps, but a large pull can still overwhelm your healing.
- Paladin: use suitable distance equipment and manage both health and mana. Compare the complete bonuses of your weapon and supporting gear.
- Sorcerer: build around your attack spells and mana supply. If you use mana shield, the mana spent absorbing damage must also be replenished.
- Druid: prepare your own attack and healing rotation, plus the support spells you use with a group. Supporting teammates does not replace keeping yourself alive.
Check more than the spell words
Use !spells for your current spell reference. Review level, vocation, mana and any unlock requirement. Some custom spells require their unlocking item before you can cast them.
Spells and restoration items have their own cooldowns. Repeatedly pressing a key does not guarantee another immediate use. Make your setup comfortable enough to use consistently while moving.
When comparing upgrades, test several uses under the same conditions. Different enemies, buffs and critical hits can make an isolated number misleading. Damage Breakdown helps you review recent incoming damage, including mana-shield damage.
Dungeons, bosses and personal hunts.
!dungeon to browse the Dungeon window.Opening the Dungeon window is free and does not enter a dungeon. The first listed dungeon tier begins at level 100; use the live window to see which content is available to your character.
Start bossing at your level
Daily bosses use separate rooms so more than one player can fight at the same time. Check the Boss Cooldowns window and prepare before entering. Eligible personal boss rewards are collected through the Reward Chest system.
When you are ready for more
The Ascendant Rift offers another progression challenge. From level 1,000, a normal Spawn Parchment provides a personal hunting instance that scales with your level. Read the entry information and prepare your supplies first.
Dungeon tiers and rewards →Explore the Ascendant Rift →
Build a bossing routine.
| Daily boss | Entry level | Getting ready |
|---|---|---|
| Blue Eyes White Tiger | 1,000 | Prepare for the first daily-boss tier. |
| Magma Golem | 2,000 | Review your gear, Masteries and sustained healing. |
| Demonic Hydrax | 3,000 | Bring a developed build for the higher daily-boss tier. |
Before entering
Check the encounter in the Boss Cooldowns window. Daily bosses have multiple separate rooms so players do not all have to wait for one room. Entry level is a minimum requirement, not a promise of an easy kill.
Inspect the boss where available to see its reward pools. Restore your supplies, prepare your healing and read the entry information before committing to the fight.
After the kill
Check the Reward Chest for eligible personal rewards. Normal boss rewards can arrive there rather than directly in your backpack or all appearing on the corpse.
Loot follows the encounter's reward rules. An item listed in Inspect is not guaranteed on every kill. Different pools, eligibility and personal bonuses can affect the result.
Gear, upgrades and checkpoints.
Choose your equipment
Use the Equipment Atlas to filter by level, vocation and category. Compare the full bonuses: weapon attack alone does not describe a complete build.
Open the Equipment Atlas →Upgrade with a plan
The Upgrade Machine improves your gear with upgrade stones. The Rarity Forge develops eligible items through rarity tiers. Read the displayed requirements and chances before committing materials.
Rarity and forge guide →Unlock your routes
Discover checkpoints as you explore, then use your Teleport Doll to return to unlocked destinations. Check the destination's level and access requirements before travelling.
Keep exploring quest areas: many permanent rewards come from completing objectives rather than repeatedly hunting one spawn.
Compare equipment properly.
Base item, upgrade and rarity
The Equipment Atlas helps you compare base items. Equipment worn by another player can also have upgrade and rarity bonuses, so compare like with like. A developed lower-tier item may differ from a fresh higher-tier piece.
Check level and vocation requirements before buying or swapping gear. Read offensive bonuses, Protection, skills and regeneration. Remember your rings, necklaces, charms and ammo-slot pieces.
Two separate progression systems
The Upgrade Machine uses upgrade stones to improve an item's upgrade level. Check the available controls, your chosen target and the materials you intend to spend.
The Rarity Forge develops eligible gear through rarity tiers. Read the success chances and possible results before using a Rarity Upgrader. An upgrade level and a rarity tier are separate properties.
Use the Atlas's level and category filters to plan your next set. A sensible full loadout is often more useful than spending everything on one slot while leaving the others behind.
Charms & your Charm Bag.

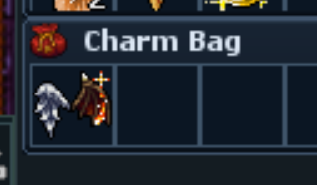
Your Charm Bag has five slots. Open the red bag in your equipment area and place eligible charm items inside it to gain their effects. Carrying a charm loose in an ordinary backpack is not the same as equipping it in the Charm Bag.
Charms are part of your build, alongside equipment and Masteries. Read each charm’s description: different charms provide different combinations of Power, Protection, Strength, Piercing, skills, speed or other bonuses.
Choose a purpose for each slot
- Offensive build: compare bonuses that support your vocation’s attacks, such as Power, Strength, Stronger hit chance and Piercing.
- Defensive build: look for useful Protection and survival bonuses. Check your final character stats, since combat caps can limit the benefit of another bonus.
- Mixed build: use some slots for damage and others for survival, rather than choosing every charm by a single stat.
Compare the complete charm, including any upgrade or rarity bonuses shown on it. You can browse charms in the Equipment Atlas.
Orbit Coins & Gold Nuggets.

Orbit Coins
A physical in-game currency used for useful supplies and cosmetic purchases. Look for them in eligible monster loot and reward systems, and keep them separate from ordinary sellable loot.
Orbit Coin exchange offers include EXP Sticks, Loot Sticks, Roulette Tokens, Stamina Refillers and Spawn Parchments. Some exchanges can use coins in your inventory and your separate Orbit Coin bank balance.

Gold Nuggets
A high-value physical currency: one Gold Nugget represents 1,000,000 gold. Nuggets also have direct uses at exchange offers and the Cosmetics NPC, so consider those uses before spending them.
Eligible loot and boss rewards can contain nuggets. Check your backpack and, for boss rewards, your Reward Chest.
Useful exchange examples
The exchange offers below have separate Orbit Coin and Gold Nugget options. The numbers are alternative prices, not a requirement to pay both currencies.
| Receive | Orbit Coin option | Gold Nugget option |
|---|---|---|
| 1 EXP Stick | 50 Orbit Coins | 70 Gold Nuggets |
| 1 Loot Stick | 50 Orbit Coins | 70 Gold Nuggets |
| 1 Roulette Token | 100 Orbit Coins | 300 Gold Nuggets |
| 1 Stamina Refiller | 125 Orbit Coins | 250 Gold Nuggets |
| 1 Spawn Parchment | 1,000 Orbit Coins | — |
Read the offer before confirming a purchase. The Cosmetics NPC uses a mix of both Orbit Coins and Gold Nuggets, unlike the alternative exchange prices above.
Cosmetics: what each item does.
Cosmetic unlocks and selecting your appearance are separate steps. Use the relevant item from your backpack, review the menu and confirm your choice. Then open Customise Character from your character’s context menu to select your owned appearance options. A preview alone does not mean an unlock has been purchased.

Mystic Threads
Use the threads from your backpack to open an outfit-selection menu. Preview an available outfit and confirm the one you want to unlock.

Addons Token
Opens a selection window for missing addons on outfits you already own. The base outfit must be unlocked first; addons add details to that outfit.

Tamer’s Brew
Opens the mount-selection menu. Unlock a mount, then select it in Customise Character and enable the mount option when available.

Wings of Ascension
Choose a pair of wings to unlock. Select your owned wings in Customise Character and enable their preview/display option.

Aura Essence
Choose an aura effect to unlock. Auras appear around your character; select an owned aura in Customise Character.

Shader Essence
Choose a shader to change your character’s visual treatment. Select the unlocked shader in Customise Character and enable it.

Avian Seal
Opens the bird-companion selection menu. Choose an available companion and select it through the Birds option in Customise Character.

Custom Magic Wall
Opens the Magic Wall customisation list. This changes the wall’s appearance; it is a separate cosmetic choice from your outfit, wings and aura.
Buying from the Cosmetics NPC
Say hi, then outfits, retro or mounts to browse the matching offers. Outfit offers use a mixture of Gold Nuggets and Orbit Coins, generally 100–500 of each; the menu shows the exact requirements for your choice.
For example, the Knight outfit costs 100 Gold Nuggets + 100 Orbit Coins, while Retro outfits listed by this NPC cost 500 of each. Read the selected offer before purchasing.
Retro outfits & specific unlock items
Owning a Retro outfit includes both addons at no additional cost. Unlock the base Retro outfit, then select the addons in Customise Character.
Some special dolls, potions and other cosmetic items unlock one named appearance, rather than a whole selection menu. Read the item description before using or trading it.
If an owned effect does not appear, check both the selected appearance and the relevant Show option in Customise Character, then apply the changes.
Travel, supplies and boosts.
Checkpoints & Teleport Doll
Discover and activate checkpoints as you explore. Unlocking one gives your Teleport Doll a return destination; owning the doll does not unlock the whole world automatically.
Check the destination name, access requirements and any boss status shown in the travel window. Establishing routes makes it easier to return to your favourite areas.
Timed boosts
Read a boost's description before using it: what it increases, how long it lasts and whether another use extends the duration or adds a different bonus. Plan your hunt before activating valuable boosts.
Keep EXP, loot and stamina effects distinct. A better loot bonus is not the same as a higher experience rate, and an EXP percentage does not tell you how safely you can hunt.
Personal hunting instances
Normal Spawn Parchments are available from level 1,000 and provide personal hunting content that scales with the entering player's level.
Bring supplies, read the instance information and plan around its limits. Return to ordinary hunts, quests or dungeons when you want a different kind of progression.
Loot, Auto Loot and your bank.
Choose what you collect
!autoloot shows supported commands. !autoloot list reviews your selections, or explains when the list is empty. Use the correct item names and keep the slot limit in mind.
Leave room in your backpack and watch your carrying capacity. Separate upgrade materials and useful currencies from loot you plan to sell.
Know where to look
Backpack contents, bank gold and Reward Chest loot are separate. If a reward or sale does not appear where expected, read the system message and check the appropriate destination.
Before selling equipment or materials, consider your next build and upgrades. The item description and Equipment Atlas help you identify a piece before letting it go.
Join a guild. Join the action.
A guild gives you shared goals
Guilds progress through 20 levels, earn Guild Points together and unlock perks and exclusive boss summons. Ask in chat for an active guild and use the Guild Hub to see its progression.
Your guild's available points are its spending balance. Lifetime points determine its level, so spending Guild Points does not reduce that progression. Leaders and vice-leaders manage guild spending.
Higher progression unlocks difficult summons such as Devileye at guild level 15 and Magician at guild level 20. Arrange these fights with your guild before summoning.
Guild progression guide →Take a break from hunting
Type !events for joining countdowns and upcoming events. When an entry portal opens, follow the announcement to the temple. Check the rules and rewards for the event you join.
The Games Hub also offers Tower Defence, Red Light Green Light, Football and casino games.
Games Hub and event guide →Your starter command sheet.
Type these in the game chat. Commands that open custom windows require an up-to-date Orbit client. Use commands exactly as shown and read the response for any additional requirements.
| Command | What it does |
|---|---|
!mastery | Open MasteriesSpend points on your general build, explore Ultra, and review your vocation spell trees. Allocation can require a protection zone. |
!dungeon | Open the Dungeon windowBrowse available dungeons and check their requirements. Opening the window does not enter a dungeon or spend anything. |
!events | Open the Events panelCheck active events, joining countdowns and upcoming starts. Follow the broadcast to enter through the temple portal. |
!spells | Open your spell referenceReview your vocation spell list, requirements and spell words before setting up hotkeys. |
!autoloot | See Auto Loot instructionsShows the supported Auto Loot commands. Your collection list has a slot limit. |
!autoloot list | Review Auto Loot selectionsDisplays your selected loot list, or tells you when it is empty. |
!bless | Add blessings when eligibleUse before hunting and read the response to check whether blessings were added or are already present. |
!changestats | Change health and mana displayChanges your health/mana display style, not your actual maximum stats. |
!commands | See more player commandsOpen the in-game command reference. |
Quick answers for new players.
I have points, but cannot allocate a Mastery.
Check the point cost, allocation limit and prerequisites. Some allocations require a protection zone. Ultra options can cost more than normal Masteries.
I can see a dungeon, but cannot enter it.
Opening the window and being eligible to enter are different. Check its level, cooldown and other entry conditions in the live window.
I killed a boss, but did not see loot in my backpack.
Check the Reward Chest and encounter messages. Eligible personal rewards may go through that system. Rare equipment is chance-based rather than automatic on every kill.
My new equipment looks stronger, but performs worse.
Compare the whole loadout, your old item's upgrade and rarity, any lost Protection or regeneration, and your Masteries. Test against the same enemies under the same conditions.
The client cannot load DAT or SPR files.
Use Orbit's matching files rather than standard Tibia files. Close the game and run the current OrbitLauncher from inside your client folder. Accept the repair update. If an old launcher stays stuck, replace it using the official Windows download.
Windows says VCRUNTIME140.dll is missing.
The current Windows launcher can download Microsoft's required x86 runtime and guide you through installation. Approve the Windows permission prompt when asked. You do not need the full Visual Studio application.
A custom window is missing or outdated.
Close your clients, reopen the official launcher and accept the update. Start the client from the folder you updated. Windows and Android downloads are on the official Downloads page.